Uploading Documents
The Uploading procedure involves assembling all the documents for a particular encounter in an Encounter Folder, then uploading the Encounter Folder to the MedKaz Server. Click here to see an overview of the documentation process.
- When an encounter is ready for processing (the Encounter Summary and all other relevant documents have been completed):
- Open a web browser
- Go to the MedKaz web site (http://medkaz.com/logon.htm)
- Log on using your provider's user name and password.
-
Click the Upload Scanned Documents tab:

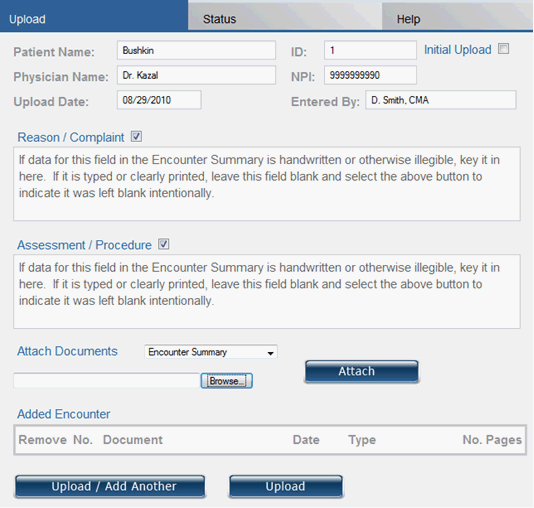
- The Upload form appears. Enter the patient name and their ID number. The ID number is shown on the Encounter Summary report as well as the MedKaz Help/About menu.

Check the Initial Upload checkbox only when you are preparing a new MedKaz to be dispensed to a patient. Such an upload will include many Encounter Summaries and many related documents.
- Specify the type of document you are uploading by using the pull-down menu. Note that the form changes depending on the type of document that you are attaching.
- When uploading an Encounter Summary for example, both the Reason/Complaint and Assessment fields in the original document may be populated when you receive it. If either or both are blank, look at the original documents to see if they contain the missing information. If they do, check the box indicating the information is available in another form being uploaded, and leave the field blank. If they don’t, key in the information from the original document.

- For example, if you are attaching a lab or test report, you can use check boxes to identify the type of report:

- To upload the Encounter Summary, click the Browse button next to the Attach Documents field, and go to the directory used to store completed Encounter Folders, open the folder for the patient, and select a document.

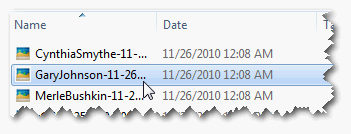
To upload the scanned document, click the Browse button next to the Attach Documents field, and go to the directory where the scanner stores its documents and select the one you want to upload:

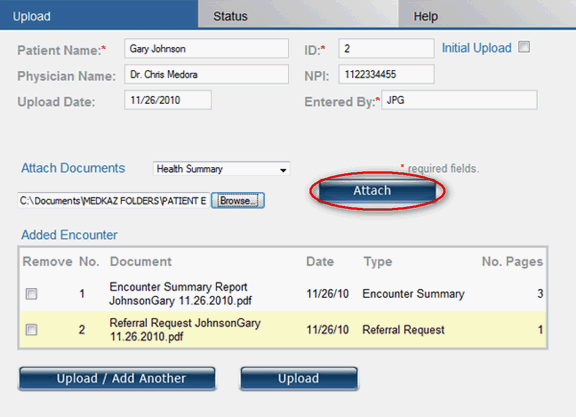
- Click the Attach button to attach the file to the web form:

- In a few moments, the filename of the attached document is added to the list of attached documents in the Added Encounter field:

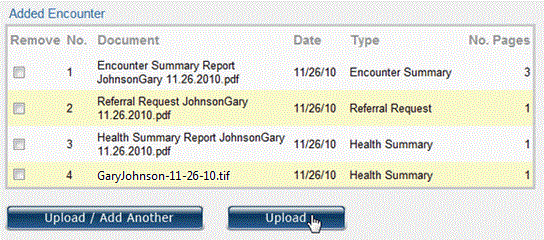
Click Upload/Another to assemble all the documents you wish to upload. If you mistakenly attach a wrong document, click the Remove checkbox. Repeat the process until you have attached the last document, then click the Upload button.
When you click Upload, all the files are uploaded, their filenames are removed from the Added Encounters field, and the Encounters Uploaded field is updated:

- When all documents for an encounter are uploaded, they are automatically "read" by the MedKaz Server and saved as computer-readable records. Click here for instructions about Verifying Uploaded Documents.
